Repairing an electric Frigidaire oven
The other day I was preheating the oven to make some tasty chicken nuggets. Suddenly the oven made a loud noise and lit up like there was a fireball inside. A moment later the breaker tripped. After the oven cooled down I took a look inside and found out that the heating element burned out. It made quite a mess and left some minor cosmetic damage on the bottom of the oven.
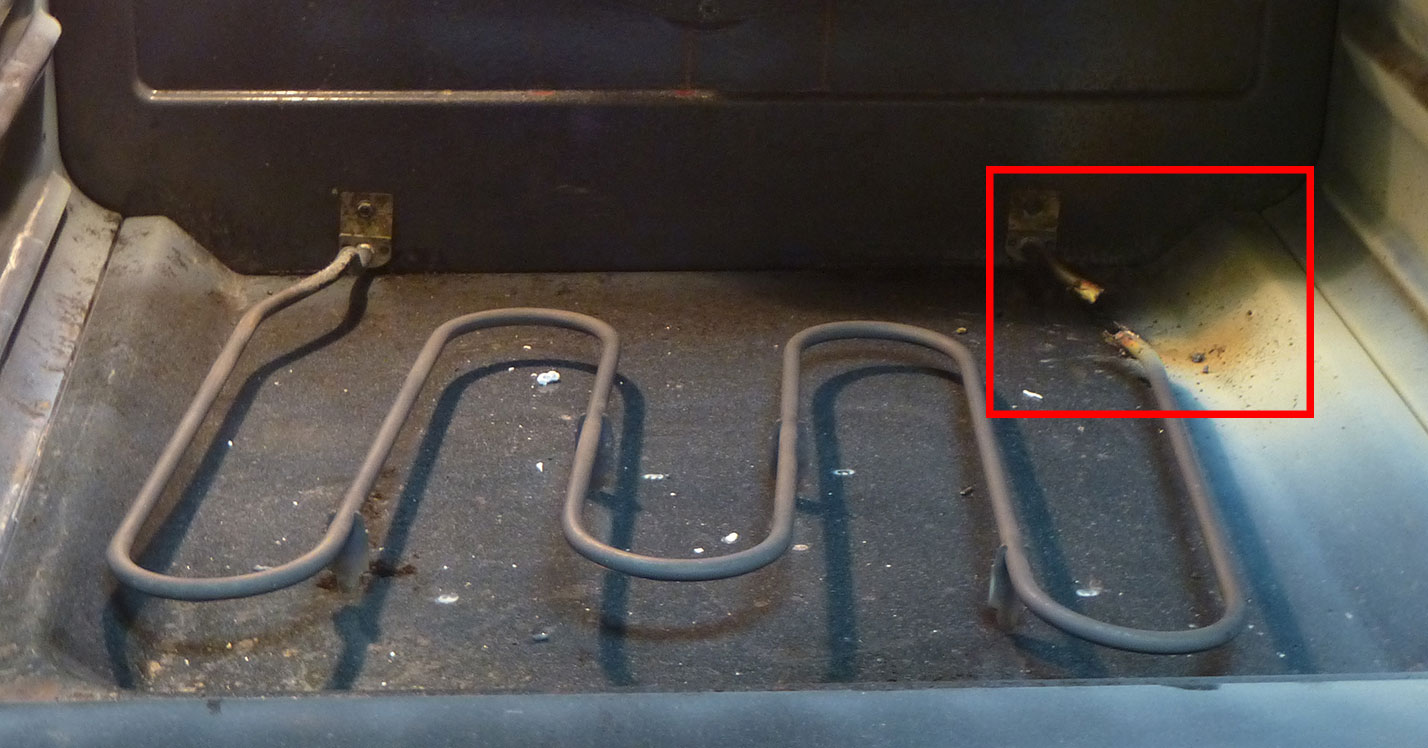
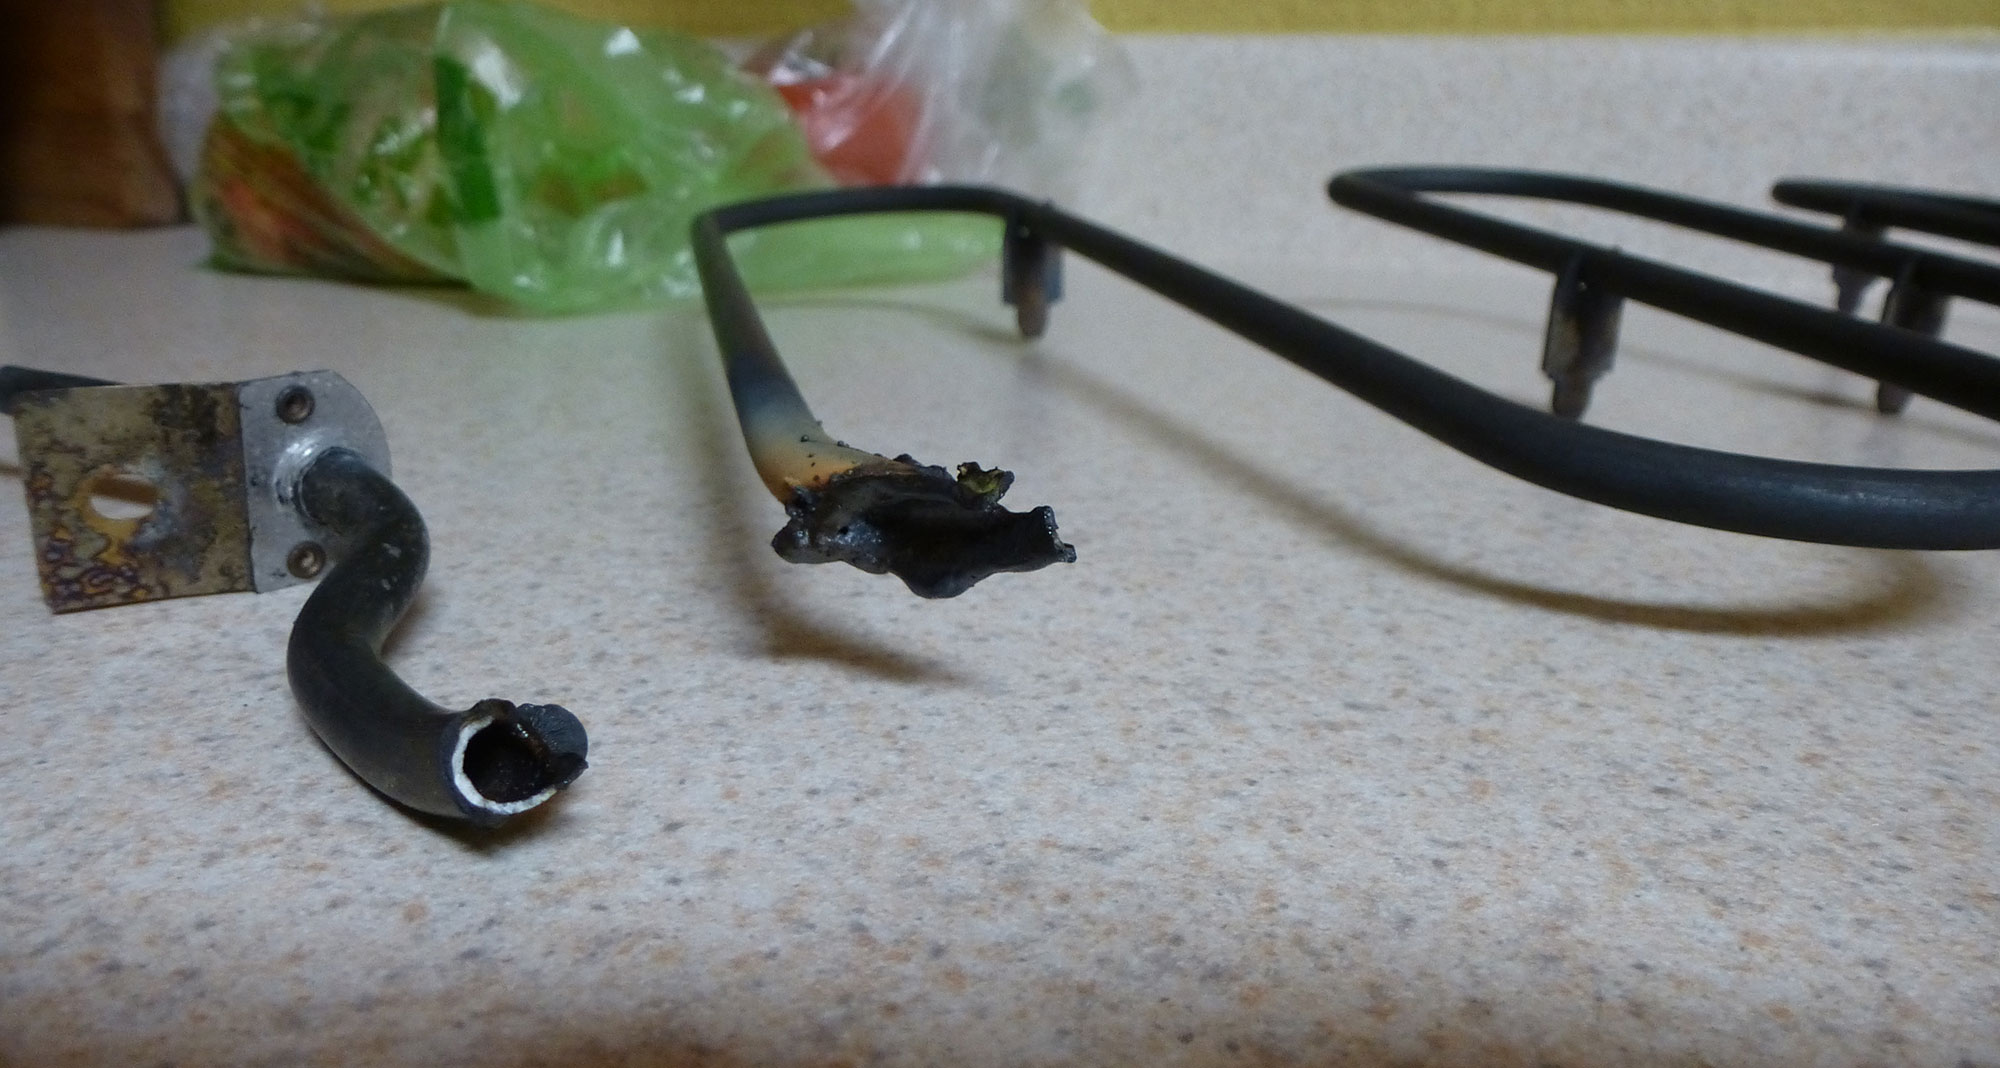
The heating element was burned all the way through. Luckily, this is an easy to replace part. I searched the internet for my oven model number to find the correct part number for the heating element, then ordered a new one off of Amazon. Installation was incredibly easy. I flipped the breaker at the outside panel, unscrewed the burned out element, popped it off, popped on the new one, screwed it on, and turned the breaker back on. Done! Super easy.
Unfortunately, there was damage to the control board that wasn’t noticeable until the new element was plugged in and turned on. There was an extremely annoying tone whenever the element was on. This is what it sounded like (the tone starts 4 seconds into the file):
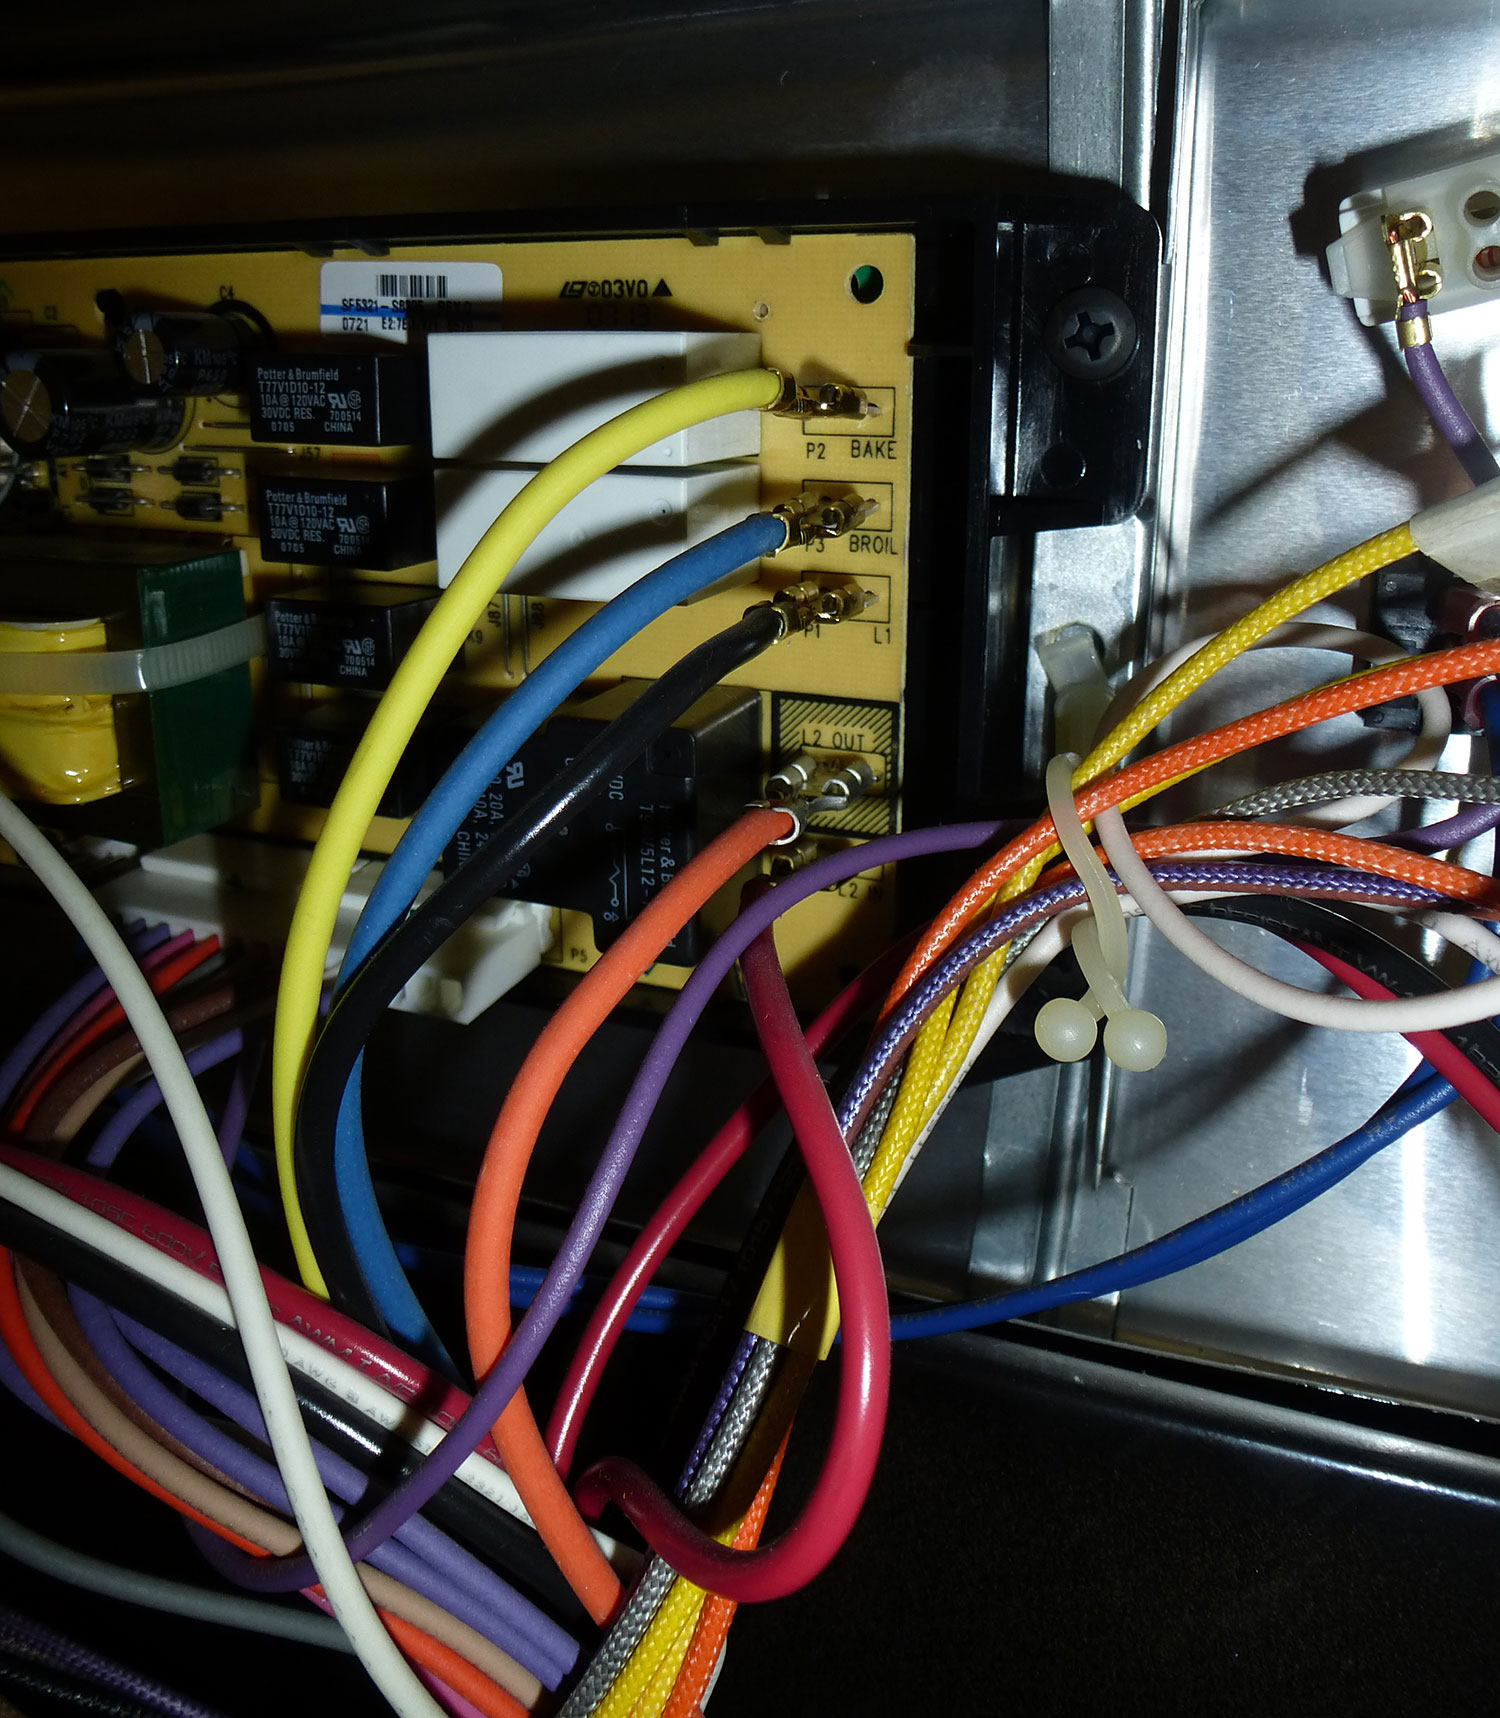
I did some more searching online and discovered that this was likely a bad relay on the control board. So back to the outside panel, flip the breaker again, take off the back cover of the oven, find the model number for the control board, and order another online. This time I used PartSimple (they had the best price I could find from a reputable site). Keep in mind that appliance parts are often manufactured by multiple companies. What matters is that the control board part number matches and it looks like it has the same parts in the same places, not who made it.
Installing the control board was a bit more complicated than installing the new heating element. I again flipped the breaker at the outside panel, then I carefully unhooked everything attached to the control board. The connections were conveniently color coded so I was able to write down which color went to which part of the board. I like to be extra careful, so I took a few photos with everything still attached as a reference.
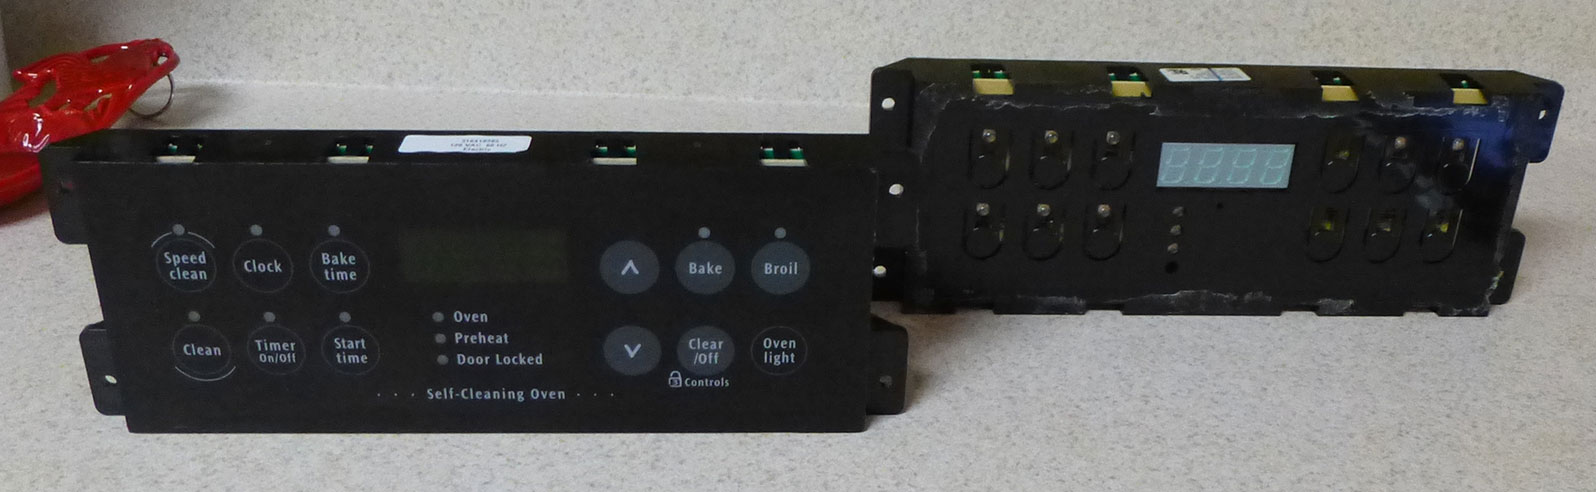
Next, I unscrewed and removed the old board. The new board didn’t come with the front piece with the button labels. I carefully pulled the front piece off of the old board and placed it on the new board. It was just glued on, and most of the glue was still tacky so I didn’t have to put new glue on it.
Finally, I screwed the new board in, attached the wires, closed up the oven, flipped the breaker, and voila! Chicken nuggets without an annoying high pitched tone!
Altogether this cost me $134.18, including tax and shipping. I’m not exactly thrilled at the cost, but definitely cheaper than hiring a repairman or buying a new oven.